
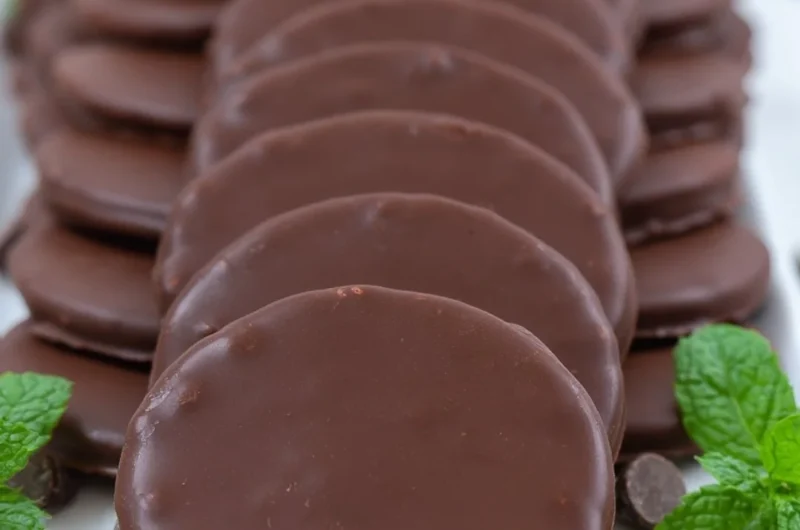
Homemade Thin Mints Girl Scouts Cookies
There’s something undeniably nostalgic about those charming green boxes of Girl Scouts cookies, isn’t there? As winter melts into spring, my heart swells with gratitude for those little delights that usher in warmer days and sweet memories. Homemade Thin Mints take me back to garden parties with friends and cozy evenings spent munching on my favorite minty treats. Imagine a warm cup of tea and the crisp, refreshing taste of chocolate and mint melting in your mouth. It’s pure comfort, wrapped in a sweet, green package.
Today, I’m thrilled to share my easy recipe for these delightful Homemade Thin Mints, perfect for those who crave that familiar taste any time of the year. Get ready to create magical moments in your kitchen with these cozy cookies. This is one you’ll definitely want to pin for later!
Why You’ll Love This Recipe
- Crowd-Pleasing Delight: These cookies are a hit at any gathering, making them a perfect treat to share with friends and family.
- Easy to Make: With simple ingredients and straightforward steps, this homemade recipe is a refreshing alternative to store-bought cookies.
- Amazing Mint Flavor: The addition of peppermint extract adds a refreshing zing that pairs beautifully with the rich chocolate coating.
- Versatile Treat: Perfect for any occasion, whether it’s a cozy night in, a festive gathering, or even as homemade gifts.
- Fun Baking Experience: Bake these cookies with your loved ones and create lasting memories in the kitchen.
What You’ll Need
Gather these simple ingredients to bring your Homemade Thin Mints to life:
- 1 cup butter, softened
- 1 cup granulated sugar
- 1 teaspoon vanilla extract
- 2 cups all-purpose flour
- 1/2 cup unsweetened cocoa powder
- 1/2 teaspoon salt
- 1 teaspoon peppermint extract
- 3 cups semi-sweet chocolate chips
- 2 tablespoons vegetable oil
Let’s Make It Together
Creating these delicious cookies is a breeze! Follow these simple steps for a batch of Homemade Thin Mints that will surely warm your heart:
- In a large mixing bowl, cream together the butter and sugar until smooth. Treat yourself to a whiff of that sweet scent as it blends!
- Beat in the vanilla extract and peppermint extract, letting the fresh minty aroma greet you.
- In another bowl, combine the flour, cocoa powder, and salt. Gradually add these dry ingredients to the wet mixture and mix until just combined—the dough should be soft and slightly sticky.
- Refrigerate the dough for about 30 minutes to make it easier to roll out and cut.
- Preheat your oven to 350°F (175°C) while the dough chills.
- Roll out the dough to about 1/8 inch thickness and cut into circles using a cookie cutter or the rim of a glass.
- Place the cookies on a baking sheet lined with parchment paper, arranging them with a little space in between.
- Bake for 10-12 minutes, then let cool on a wire rack—the aroma will have your family flocking to the kitchen!
- In the meantime, melt the chocolate chips with the vegetable oil in a microwave or double boiler, stirring until smooth and glossy.
- Dip each cookie into the melted chocolate, fully coating it, then place it on a wire rack to set. Feel free to lick the spoon—it’s a must!
- Enjoy your homemade Thin Mints, either warm or store them for later! Your home is now filled with the enchanting smell of minty chocolate.
Fun Ways to Customize It
Want to put a personal twist on your Thin Mints? Here are a few delicious variations to try:
- Chocolate-Dipped Coconut: Add toasted coconut to the chocolate coating for a tropical twist that delights the senses.
- Peanut Butter Surprise: Swirl in creamy peanut butter into the dough before chilling, or drizzle over the chocolate for an indulgent topping.
- Zesty Orange: Add a splash of orange extract for a refreshing citrus-flavored cookie that complements the mint beautifully.
- Rich Dark Chocolate: Use dark chocolate chips for an extra decadent treat that will satisfy even the strongest cravings.
Chef Emma’s Helpful Tips
To ensure your Homemade Thin Mints turn out perfect every time, keep these kitchen secrets in mind:
- Make-Ahead: You can prepare the dough in advance and store it in the refrigerator for up to 3 days or freeze it for up to a month. Fresh cookies any time!
- Ingredient Swaps: If you run out of peppermint extract, try using other extracts, like almond or coconut, for a unique flavor.
- Store Properly: These cookies can be stored in an airtight container for up to a week. But trust me, they won’t last that long!
- Slicing Trick: If you prefer uniform shapes, use a cookie cutter or an empty can cut into different shapes for some fun!
What’s Inside – Nutrition Breakdown
- Serving Size: 1 cookie
- Calories: 150
- Carbs: 20g
- Sugar: 10g
- Fat: 7g
- Protein: 2g
- Sodium: 50mg
Common Questions Answered
Here are some frequently asked questions about making your own Homemade Thin Mints:
- Can I make this ahead? Yes, the dough can be prepped in advance and stored in the fridge or freezer!
- Can I use different ingredients? Certainly! Feel free to swap out extracts or chocolate types to suit your taste.
- How do I store leftovers? Keep cooled cookies in an airtight container at room temperature.
- How long does it last? These cookies stay fresh for about a week, though they’re usually gobbled up much faster!
Wrapping It Up
Creating your own Homemade Thin Mints is more than just baking—it’s about bringing smiles, warmth, and a touch of nostalgia into your kitchen and home. These cookies are delightful, easy to make, and delicious to share with those you love. Whether you’re cozied up on a rainy day or hosting a festive gathering, these minty treats will add comfort and joy to your moments.
Save this Homemade Thin Mints Girl Scouts Cookies recipe to your Pinterest board so it’s ready when you need a cozy treat! Happy baking!

Homemade Thin Mints Girl Scouts Cookies
- Total Time: 42 minutes
- Yield: 24 servings 1x
- Diet: Vegetarian
Description
Delightful homemade Thin Mints that bring back the nostalgic flavors of Girl Scouts cookies, perfect for any occasion.
Ingredients
- 1 cup butter, softened
- 1 cup granulated sugar
- 1 teaspoon vanilla extract
- 2 cups all-purpose flour
- 1/2 cup unsweetened cocoa powder
- 1/2 teaspoon salt
- 1 teaspoon peppermint extract
- 3 cups semi-sweet chocolate chips
- 2 tablespoons vegetable oil
Instructions
- Cream together the butter and sugar until smooth.
- Beat in the vanilla extract and peppermint extract.
- Combine the flour, cocoa powder, and salt in another bowl.
- Gradually add the dry ingredients to the wet mixture and mix until just combined.
- Refrigerate the dough for about 30 minutes.
- Preheat your oven to 350°F (175°C).
- Roll out the dough to about 1/8 inch thickness and cut into circles.
- Place the cookies on a baking sheet lined with parchment paper.
- Bake for 10-12 minutes, then let cool on a wire rack.
- Melt the chocolate chips with the vegetable oil, stirring until smooth.
- Dip each cookie into the melted chocolate, then place on a wire rack to set.
Notes
Dough can be prepared in advance and stored in the refrigerator for up to 3 days or frozen for up to a month.
- Prep Time: 30 minutes
- Cook Time: 12 minutes
- Category: Dessert
- Method: Baking
- Cuisine: American
Nutrition
- Serving Size: 1 cookie
- Calories: 150
- Sugar: 10g
- Sodium: 50mg
- Fat: 7g
- Saturated Fat: 3g
- Unsaturated Fat: 4g
- Trans Fat: 0g
- Carbohydrates: 20g
- Fiber: 1g
- Protein: 2g
- Cholesterol: 30mg