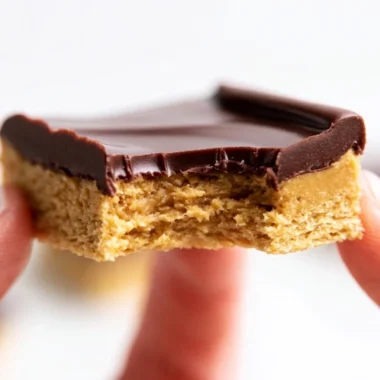
No-Bake Peanut Butter Buckeye Bars
In the kitchen, there’s something magical about combining creamy peanut butter and velvety chocolate. It conjures memories of cozy afternoons spent nibbling on sweet treats with loved ones. Buckeye bars, with their rich and nutty flavor, remind me of visits to family friends who always had a tin of these delightful squares at the ready. The way the chocolate melts together with that creamy peanut butter filling is pure comfort in a bite! Whether you’re preparing for a gathering or just need a sweet nibble for yourself, these No-Bake Peanut Butter Buckeye Bars are sure to hit the spot. This is one you’ll definitely want to pin for later!
Why You’ll Love This Recipe
- Quick to Make: With just a few simple steps, you can whip up this indulgent treat in no time.
- No-Bake Delight: Perfect for warm weather or when you want to avoid turning on the oven.
- Family-Friendly: Kids love to help mix and press the buttery mixture and, of course, enjoy eating them!
- Crowd-Pleasing Flavor: Rich peanut butter and dreamy chocolate layers make this an irresistible dessert for any gathering.
- Easy to Customize: You can turn these bars into your own masterpiece with fun variations and toppings.
Ingredients You’ll Need for No-Bake Peanut Butter Buckeye Bars
- 1 cup peanut butter
- 1/2 cup powdered sugar
- 1/4 cup graham cracker crumbs
- 1 cup chocolate chips
- 1 tablespoon coconut oil
How to Make No-Bake Peanut Butter Buckeye Bars
- In a mixing bowl, combine peanut butter, powdered sugar, and graham cracker crumbs until well blended, creating a rich and creamy base.
- Press the mixture firmly into a lined 8×8 inch baking pan, ensuring it’s smooth and even.
- In a microwave-safe bowl, melt the chocolate chips and coconut oil together until smooth and glossy, creating a luxurious chocolate layer.
- Pour the melted chocolate over the peanut butter layer, spreading it evenly for a beautiful finish.
- Refrigerate for at least 2 hours or until set; the longer it chills, the better the flavors meld together.
- Cut into squares and serve, savoring each delightful bite!
Variations & Creative Twists
- Add Crunch: Mix in some chopped nuts like peanuts or almonds for a nutty crunch that complements the creamy texture.
- Swirl It Up: Create a delightful marble effect by swirling in some creamy caramel before topping with chocolate.
- Minty Fresh: Add a few drops of peppermint extract to the peanut butter layer for a refreshing twist that’s perfect for the holidays.
- Zesty Orange: Incorporate orange zest into the peanut butter layer for a bright and zesty flavor that elevates this classic treat.
Tips for Perfect Results
- Make-Ahead Advice: These bars can be made a few days in advance; just keep them refrigerated until you’re ready to serve.
- Ingredient Swaps: If you don’t have graham cracker crumbs, crushed cookies or even oats can work as a substitute.
- Slicing Tricks: For clean cuts, run your knife under hot water before slicing into the chilled bars.
- Storage Suggestions: Keep any leftover bars in an airtight container in the fridge for up to a week — if they last that long!
What’s Inside – Nutrition Breakdown
- Serving Size: 1 square
- Calories: 180
- Carbs: 18g
- Sugar: 10g
- Fat: 10g
- Protein: 4g
- Sodium: 70mg
Frequently Asked Questions
Can I make this ahead?
Absolutely! These bars are perfect for making ahead of time. Just store them in the fridge until you’re ready to enjoy.
Can I use different ingredients?
Sure! Feel free to experiment with flavors — almond butter, rice cereal instead of graham crumbs, or dark chocolate for a richer finish.
How do I store leftovers?
Store any remaining bars in an airtight container in the refrigerator for up to a week.
How long does it last?
These bars can last up to a week in the fridge. Just remember to keep them stored well to maintain their deliciousness!
A Cozy Closing Note
These No-Bake Peanut Butter Buckeye Bars are not just a treat; they’re a memory in the making. Each square is a delightful bite of nostalgia, perfect for sharing with family or savoring alone while wrapped in a cozy blanket. Save this recipe to your dessert board so it’s ready when you need a cozy treat!